Monthly Archives: October 2010

Collecting Leaves

The school has been off for the tattie holidays for the last couple of weeks. Last week Big A went on his ‘holidays’ to my parents, this week Mr A has been off work and we have done various activities with the children. But Wednesday was a perfect day.

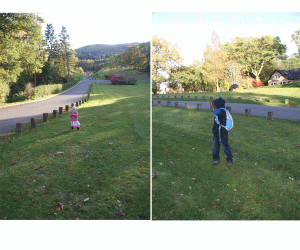
It was so cold, about 4 or 5 deg C, but beautifully sunny and dry so was the perfect day for collecting leaves to use for crafts at a later date.  There isn’t much explanation needed, as the pictures say it all.

It started to get to that point where it’s just too cold, so we decided that we had enough leaves ( both children’s backpacks were full!) and we walked back to my parents house via the train station – which pleased Big A very much!

And although it was a Wednesday, it felt very much like a lazy Sunday afternoon. So now all we have to do is make our leaf prints and leaf collages and we are done!

Leave a comment

Filed under Lazy Sunday Afternoons, Sentimental Old Me

Practice, practice, practice!

So, I thought it was about time that I make a proper start on Harry and Rosie the stars of the show!!

Whilst Big A was away at my parents for a couple of days and Little A was napping I decided it was time to bite the bullet and just go for it! And the result wasn’t to shabby  – for a first attempt at making a stuffed toy!

An old pair of curtains and a fair bit of mess later and I had all the parts of the practice bear made and stuffed and this was the result ( minus the ears which I forgot to do!):

 His feet are a bit odd because I was experimenting with how best to stuff and sew them. But, I did get his legs attached – not great I have to admit, but they are on! Eyes and nose are currently drawn on, however on Harry and Rosie they will be embroidered on.


The only thing I am concerned about really is the size – I am going to make the finished Harry and Rosie bigger, so Mr A was sent off to work yesterday morning with a pile of patterns to enlarge on the photocopier! They look much better now though and am pleased with the size – so much so I already have several in mind for presents and having seen the practice bear also have several requests!

What have I gotten myself into?

3 Comments

Filed under A Home Made Christmas, Fabric obsessions, Harry & Rosie - the bear and the cat, Sentimental Old Me

Red Onion Chutney. Mmmmmmmm……………

Red onion chutney is so delicious with so many things, even the humble cheese toastie!

Before you start, wash more jars than you think you need in hot soapy wather then place in a low oven (gas 1)  for an hour to sterilise them, leave them there until you need them if the chutney takes you longer than an hour to make as they need to be filled whilst hot.  alternatively, put them through the dishwasher, however they need to be filled whilst still warm.

I like to use Kilner jars as they look great when full of yummy chutney, however any jar will do – this is a great way to recycle your jars ( or even those of your friends and family).

So, here is my recipe. It makes approximately 3/4 litres. So, here is what you will need:

  • 1 kg red onions
  • bouquet garni
  • aprox 25 ml olive oil
  • 200g brown sugar
  • 225ml red wine vinegar
  • 75ml balsamic vinegar

The method is relatively simple, however a good heavy bottomed pan ( eg. Le Cruset)  makes this so easy to do.

  • Peel the onions and slice thinly. Put them in the pan with the olive oil & bouquet garni and stir well so the onions have a good coating of oil.
  • Cover and cook on a low heat until the onions are soft. Then add the vinegars and sugar and stir well. Cover and cook on a low heat for 15 mins then uncover and stir well.

The onions should now look like this:

  • Leave to simmer on a low heat until the onions are dark and sticky and the liquid has reduced by 2/3.

This is what they should look like now:

  • Switch off the heat, take the jars out of the oven and spoon the onions into them. Leave until completely cooled before closing the lid.

  • Enjoy!

This is a fab present for christmas. If giving as a gift I like to use the kilner jars and then tie a ribbon round the neck of the jar and add a gift tag. There is little other presentation required other than a sticky label on the jar if you want.

Leave a comment

Filed under A Home Made Christmas

Home Made and Hand Printed! (The finished article)

As promised, here is a picture of the finished picture. I love it!

The photo is not great – an unfortunate combination of a dull day, glass in the frame, peralised wallpaper and a picture on the wall directly opposite means I had to get fairly close, but stand at the side so that you couldn’t see my reflection!

I will try and get a better photo pn a brighter day and pop it in here too.

Leave a comment

Filed under A Home Made Christmas, Lazy Sunday Afternoons, Sentimental Old Me

Home Made and Hand Printed! (Part 2)

Ok, so now you have everything you need for this project. It’s actually really easy to do and even with Little A it was so simple and the children had such good fun doing it!

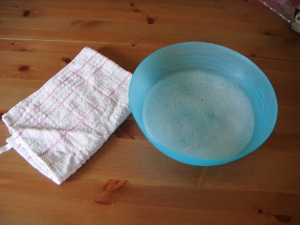
I do have 1 tip though – get a bowl of warm soapy water and a towel at the ready before starting so as each child can wash their hands as soon as they are done to avoid unwanted smudges on your paper!!

The actual printing is really easy to do and I found that the easiest way was to get Big A to do his print before Little A so that he could wash his hands and help with moving the paper out of her way while I washed her hands.

Once the handprints were dry, I added the poem using a silver metallic fine line marker pen. I bout these in a supermarket for £4 for a pack of 2 – one silver and one gold.  Great value if you want to make this look extra special.

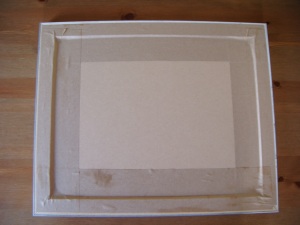
I then put the glass in the frame, added the picture and popped the backing board on.  I used Gum Tape to seal the back of the picture. I did go to buy a roll from the local framers, but as it comes in 200m rolls, he was quite happy to give me enough for a couple of frames in the size I bought.

However the large roll is not expensive at £5 for 200m, but it would take a lot of framing to get through it!! I did ask what he would advise as an alternative, and he said that normal brown parcel tape would do the trick.

We came home and Big A and I taped the back of the frame – the gum tape has to be wet to stick, and it’s a bit of a fiddle once the tape gets wet and very sticky!!

Don’t forget to come back soon and see the final result!!

4 Comments

Filed under A Home Made Christmas, Lazy Sunday Afternoons, Sentimental Old Me

Home Made and Hand Printed! (Part 1)

Ok, as promised here is the first of my projects for a hand made christmas!

I love this poem and it got me to thinking – I would love to have this framed alongside Big & Little A’s handprints.

Finger Prints

There used to be so many
Of my finger prints to see,
On furniture and walls and things,
From sticky, grubby me.

But if you stop and think a while
You’ll see I’m growing fast
Those little handprints dissapear
You can’t bring back what’s past.

So here’s a small reminder
To keep not wipe away
Of tiny hands and how they looked
To make you smile some day.


So, off to the supplies store we go and whilst I am there I think it’s a great idea to give as a christmas gift to the grandparent, aunt, uncle or parent that has everything!

Supplies for Hand Print Frames

So, you will need:

A frame of your choice  – I chose 14 x 11 inches as I have 4 handprints to fit in!

A piece of card – I have used A3 size so that it can be cut to size.

Kids washable paint and ink pad – available in a variety of colours including silver and gold.

Glass and backing board to fit your frame.

I am going to break this down a bit, so the instructions and my final result will be in the next post. I am looking forward to getting these done, and I hope you are looking forward to seeing the result and trying it out for yourself!!


Leave a comment

Filed under A Home Made Christmas, Sentimental Old Me